No product in cart
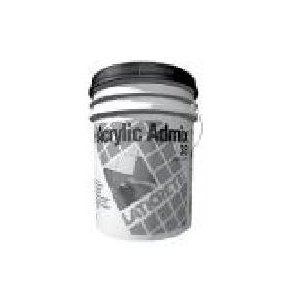
38 Acrylic Admix
-
(0s)
- Add your review
PRODUCT DESCRIPTION LATICRETE 38 Acrylic Admix is an economical acrylic latex admixture for use in place of water with thin-set mortars, cement grouts, cement mortar beds, and other cement mixes. Advantages ■ High Bond Strength—greatly increases the strength of portland cement mortars. ■ Increases density, compressive strength and chemical resistance of cement mixtures. ■ […]
#Code Products:
Description
PRODUCT DESCRIPTION
LATICRETE 38 Acrylic Admix is an economical acrylic latex admixture for use in place of water with thin-set mortars, cement grouts, cement mortar beds, and other cement mixes.
Advantages
■ High Bond Strength—greatly increases the strength of portland cement mortars.
■ Increases density, compressive strength and chemical resistance of cement mixtures.
■ Reduces water absorption.
■ Improves adhesion of mortars and grouts.
■ Locks in color in portland cement grouts.
■ Easy to Clean—cleans easily with water.
■ Safe—non-toxic and non-flammable.
Suitable Substrates
■ Concrete
■ Cement mortar beds
■ Ceramic tile and stones
■ Gypsum wallboard*
■ Cement backer board**
■ Concrete masonry
■ Cement plaster
■ Brick masonry
■ Cement terrazzo
* Interior only.
** Consult cement backer board manufacturer for specific installation recommendations and to verify acceptability for exterior use.
Packaging
5 US gallon (19 l) pail; 36 pails per pallet
Shelf Life
Factory sealed containers of this product are guaranteed to be of first quality for two (2) years if stored at temperatures >32°F (0°C) and <110°F (43°C).
Limitations
■ Use LATAPOXY® 300 Adhesive when installing green marble or water sensitive stone and agglomerates and resin backed tiles and stones.
■ Use a white thin set mortar when installing white or light-colored natural stones.
■ Adhesives/mastics, mortars and grouts for ceramic tile, pavers, brick and stone are not replacements for waterproofing membranes. When a waterproofing membrane is required, use a LATICRETE Waterproofing Membrane (see Section 10 FILING SYSTEMS).
■ Note: Surfaces must be structurally sound, stable and rigid enough to support ceramic/stone tile, thin brick and similar finishes. Substrate deflection under all live, dead and impact loads, including concentrated loads, must not exceed L/360 for thin bed ceramic tile/brick installations or L/480 for thin bed stone installations where L=span length.
Cautions
Consult MSDS for more safety information.
■ During cold weather, protect finished work from traffic until fully cured.
■ Keep out of reach of children.
■ Wait 14 days after the final grouting period before filing water features with water at 70°F (21°C)
INSTALLATION
Surface Preparation
All surfaces should be between 40°F (4°C) and 90°F (32°C) and structurally sound, clean and free of all dirt, oil, grease, paint, concrete sealers or curing compounds. Rough or uneven concrete surfaces should be made smooth with LATICRETE Latex Portland Cement Underlayment to provide a wood float (or better) finish. Dry, dusty concrete slabs or masonry should be dampened and excess water swept off. Installation may be made on a damp surface. New concrete slabs must be damp cured and at least 28 days old prior to application. All slabs must be plumb and true to within 1/4" (6 mm) in 10 ft (3 m). Expansion joints shall be provided through the tile work from all construction or expansion joints in the substrate. Follow ANSI specification A108.01-3.7 “Requirements for Movement Joints: Preparations by Other Trades” or TCNA detail EJ-171 “Movement Joints—Vertical & Horizontal”. Do not cover expansion joints with mortar.
Mixing
Stir LATICRETE 38 Acrylic Admix thoroughly before use.As a Mortar Bed Additive—Use approximately 3/4 gallon (2.85 l) of LATICRETE 38 Acrylic Admix to 60 lbs (27 kg) of LATICRETE 226 Thick Bed Mortar. Add LATICRETE 226 Thick Bed Mortar to LATICRETE 38 Acrylic Admix and mix slowly. Adjust mixture to produce a semidry consistency.
As a Thin-Set Additive—Use approximately 2 gallons (7.6 l) of LATICRETE 38 Acrylic Admix to 50 lbs (22.7 kg) of LATICRETE Thin-Set Mortar. Place LATICRETE 38 Acrylic Admix in a clean plastic pail. Do not dilute. Add LATICRETE Thin-Set mortar to LATICRETE 38 Acrylic Admix and mix to a smooth, trowelable consistency. Allow mortar to slake for 5–10 minutes. Adjust consistency if necessary.
Remix and apply with the proper sized notched trowel.
As a Grout Additive—Use approximately 1 gallon (3.8 l) of LATICRETE 38 Acrylic Admix to 50 lbs (22.7 kg) of LATICRETE 1500 Sanded Grout. Add LATICRETE 1500 Sanded Grout to LATICRETE 38 Acrylic Admix and mix to a smooth, stiff consistency. Use LATICRETE 38 Acrylic Admix full strength for exterior applications; dilute 1/1 with water for interior use.
Application
Mortar Bed—Before placing mortar, apply a slurry bond coat made from LATICRETE 4237 Latex Additive mixed with LATICRETE 211 Powder or pure portland cement. While the slurry bond coat is wet spread the mortar and compact well. If placing tile immediately, apply a slurry bond coat (made from LATICRETE 4237 Latex Additive mixed with LATICRETE 211 Powder) to the mortar.
While the slurry bond coat is wet and sticky, place the tile and beat in well.
Thin-Set Mortar—Apply mortar to the substrate with the flat side of the trowel, pressing firmly to work into surface. Comb on additional mortar with the notched side.Note: Use the proper sized notched trowel to ensure full bedding of the tile. Spread as much mortar as can be covered with tile in 15–20 minutes. Back butter large tiles >8" x 8" (>200 mm x 200 mm) to provide full bedding and firm support. Place tiles into wet, sticky mortar and beat in using a beating block and rubber mallet to embed tile and adjust level. Check mortar for complete coverage by periodically removing a tile and inspecting bedding mortar transfer onto back of tile. If mortar is skinned over (not sticky), remove and replace with fresh mortar.
Grout
Before starting to grout, remove spacers and debris in grout joints and remove dust and dirt using a wet sponge. Do not leave water standing in joints. Apply grout release or sealer if necessary. Refer to LATICRETE Grout Trouble Shooting Guide for more information on grouting. Grout installation after a minimum of 24 hours curing time at 70°F (21°C). Dampen tile surface with water. Spread with a sharp, firm rubber grout float. Work the grout paste into the joints until completely filled. Use diagonal strokes to pack the joints. Ensure that joint is filled and grout is not just sitting on top (i.e. “bridging the joint”).
Cold Weather Note: The setting of portland cement mortars and grouts are retarded by low temperatures. Protect finished work for an extended period when installing in cold weather. For faster setting mortar use thin-sets with LATICRETE 101 Rapid Latex Admix.
Do not set tile when surface temperature is below freezing or when substrate is frozen.
Hot Weather Note: The evaporation of moisture in portland cement mortars is accelerated by hot, dry conditions. Apply to dampened surfaces and protect freshly spread mortar and finished work when installing in temperatures over 95°F (35°C).
Cleaning Mortar—Clean tools and tile work with water while mortar is fresh.
Grout Primary Cleaning—Remove excess grout from the face of the tiles with the edge of the grout float. Hold the float at a 90° angle and pull it diagonally across the joints and tile to avoid pulling out the material.
Grout Secondary Cleaning—Remove remaining grout with a damp sponge (not wet) or a damp towel. Work diagonally to the joints.
Allow to dry. When the grout joints are firm, polish the surface with a coarse nylon pad or coarse cloth and minimal water.
Note: Use caution when polishing soft glazed tiles or polished stone.
You must be logged in to post a review.


Reviews
There are no reviews yet.